


")


Help! How Do I Clone from NVMe to NVMe?
Hey everyone! So, here’s my situation—I’m almost out of storage on my laptop’s hard drive. I picked up a larger NVMe SSD, but I’m stuck on how to transfer all my data easily. I definitely want to avoid the hassle of moving everything from NVMe to HDD and then back to NVMe—it’s just too much of a pain! Does anyone have recommendations for hardware or software that can simplify this process? Oh, and my laptop has only one NVMe slot. Thanks so much!
Thinking about transferring your NVMe drive to another NVMe but not sure what the easiest method is? Swapping NVMe drives can be tricky, especially when your laptop has just one slot for NVMe SSDs. So, what’s the best way to handle this?
Easiest Way to Clone NVMe to NVMe
Thinking about cloning your HDD to an NVMe SSD? Here’s how to do it smoothly and ensure a secure boot:
- Upgrade Your Hardware: Aim for a Skylake chipset or newer, though NVMe can work with older machines.
- M.2 PCI-E x4 Slot: Make sure your computer has one.
- BIOS Settings: Switch to UEFI mode and boot in UEFI.
But if your OS is already on an NVMe SSD, skip those steps and focus on these:
- Check Your NVMe Slot: If there’s only one, you’ve got options:
- Use an M.2 to PCIe adapter for another NVMe SSD.
- Backup your current NVMe SSD and restore it to a bigger one (you’ll need a temporary backup drive for this).
- Cloning Software: Get reliable NVMe SSD cloning software that can handle various cloning scenarios.
AOMEI Backupper is perfect disk clone tool for this. It offers both disk cloning and disk imaging features:
- Disk Clone: Move everything directly from one drive to another.
- Disk Backup and Restore: Create a disk image of your source drive and restore it to your target NVMe drive.
☁ Pro tip: If your computer won’t boot, create a bootable USB drive on another PC and use it to clone your NVMe SSD without booting into Windows.
Try out AOMEI Backupper’s demo version. It supports all Windows OS, making it easy to clone Windows 10 to your NVMe SSD. After testing it myself, I can say it’s one of my go-to methods.
How to Clone NVMe to NVMe: Step-by-Step Guide
Step 1. Connect your new NVMe SSD to your computer using an M.2 to PCIe adapter. Ensure it’s recognized by your system. Then, install and launch AOMEI Backupper.
Step 2. Open AOMEI Backupper, click on “Clone,” and select “Disk Clone” to begin cloning your NVMe boot drive.
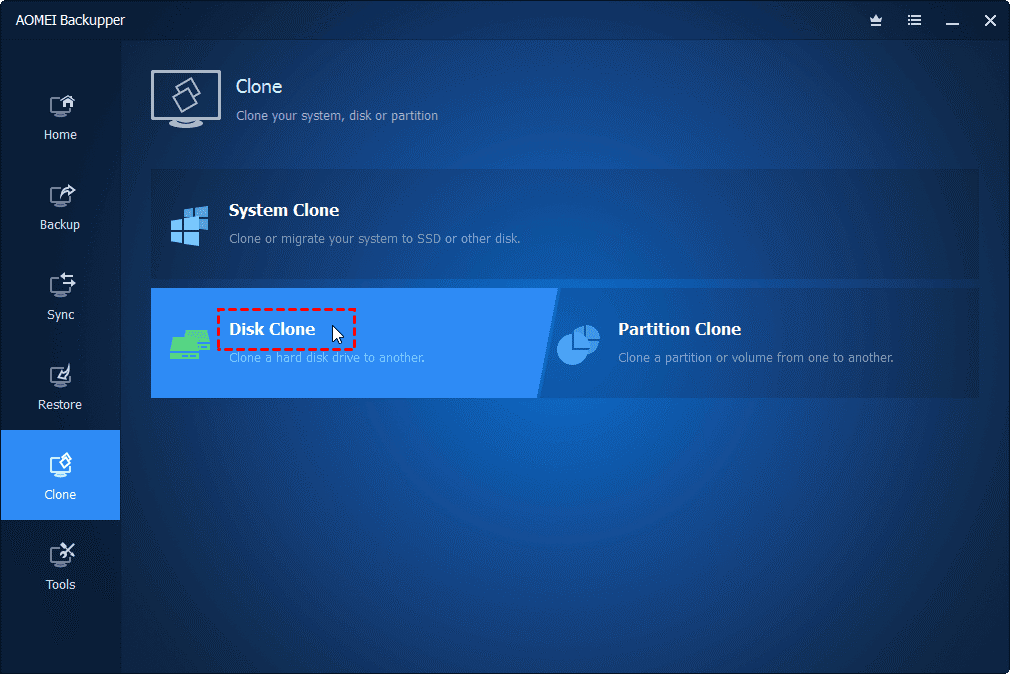
Step 3. Select your old NVMe SSD as the source and the new one as the target. Double-check the selections because the target disk will be completely erased.
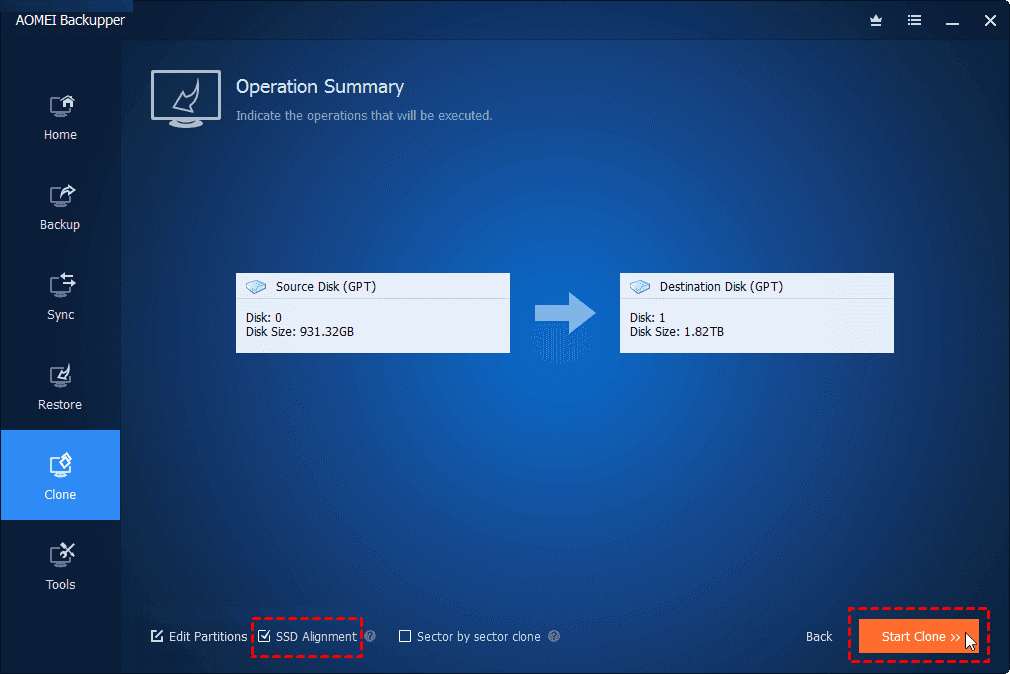
Step 4. Review the Operation Summary, set your cloning preferences, and click “Start Clone” to initiate the cloning process.
Bonus Tips:
- Edit Partitions: Optimize the extra space on your new disk. This is especially useful when cloning to a larger drive, whether HDD or SSD.
- SSD Alignment: Enable this feature for faster read/write speeds and improved SSD longevity through 4K alignment.
☁ Additional Advice:
If you’re only moving Windows to your new NVMe SSD, use the “System Clone” feature.
The above are the specific graphic steps to clone using the best cloning software – AOMEI Backupper. From the page, it seems that this software has other powerful functions, such as backup and synchronization, data recovery and other practical tools. If you are interested, you can download one and explore it yourself. Maybe this is the software for your life.
In Conclusion
That’s how you clone NVMe to NVMe on Windows 11, 10, 8, 7, XP, or Vista. It’s the simplest method available. If the NVMe to external disk and back to NVMe route seems too cumbersome, consider using an M.2 to PCIe adapter instead of a SATA to USB one, which only works with SATA drives.
AOMEI Backupper isn’t just for NVMe SSD cloning. It’s also great for system backups, cloning, and even IDE to IDE hard drive duplication. Download the free version now. Why not give it a try today?